The Discover Packages tab - Documentation
On this article, you will see a summary of the main interface to search and install packages. The interface is the window through which you (the user) interact with the UniGetUI backend engine and with the package managersOverview of the main features of the Discover Packages tab
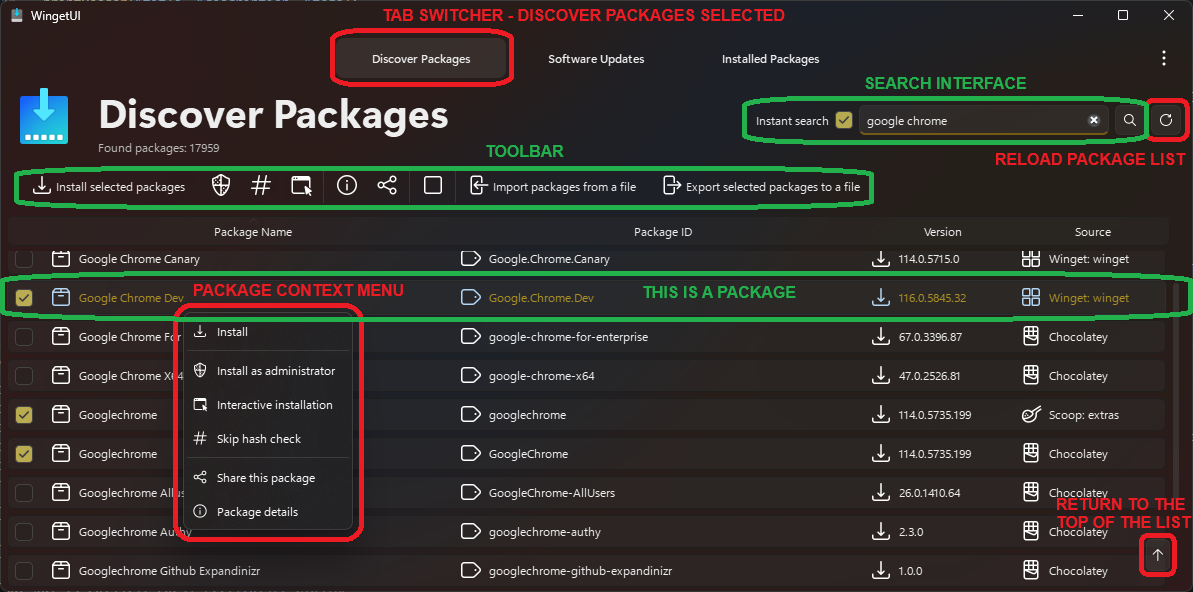
This is the main Discover Tab interface. Click the image to enlarge it.

- As it can be seen in the first picture, the context menu offers the ability to install a package in different ways:
- Install as administrator: Will run the installer with administrator privileges
- Interactive installation: Will launch the installer as if it was run by the user instead of triggering an automated installation. The user will need to install the software manually
- Skip hash check: Sometimes, some packages fail to be verified. This is the provider's fault, but if you trust them, you can skip this security check, although this is not recommended
- However, the context menu also offers two other options:
- When double-clicking a package, or when selecting the "Package Details" entry in the context menu, a new window will open. Overview of the
Detailstab - When selecting the "Share" entry in the context menu, you will be able to share packages. How does package sharing work?
- When double-clicking a package, or when selecting the "Package Details" entry in the context menu, a new window will open. Overview of the
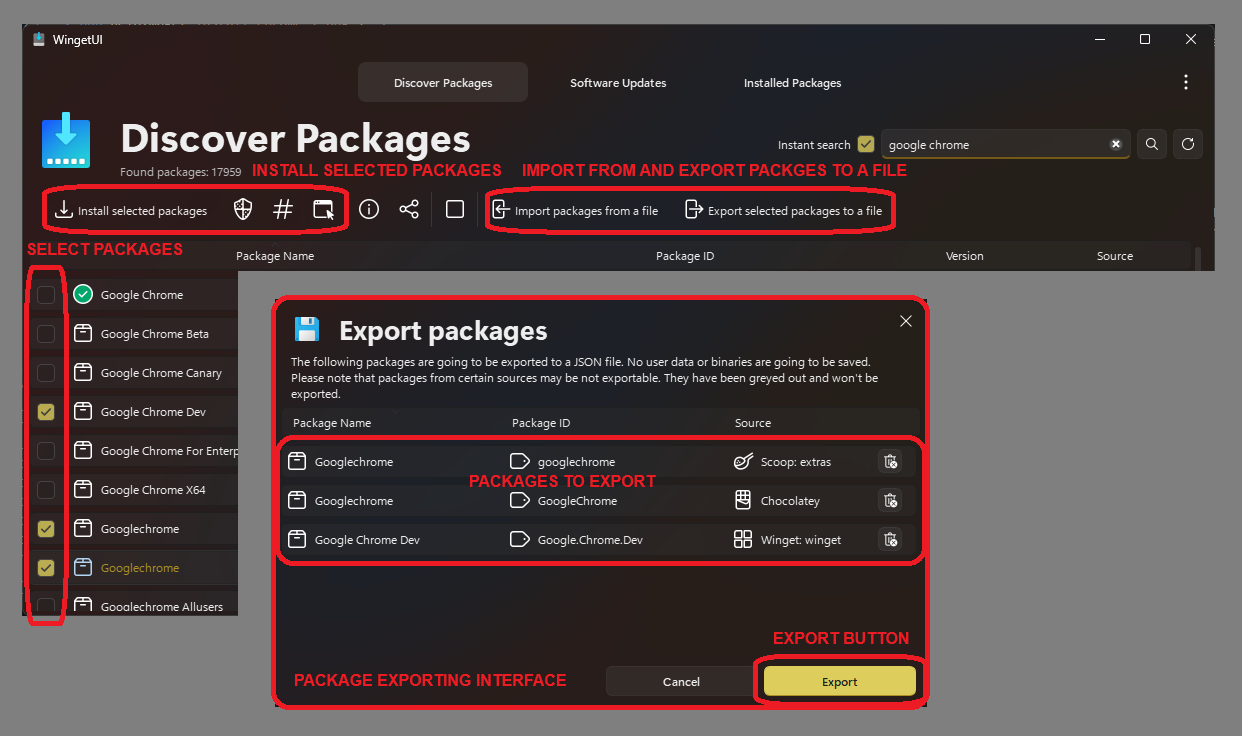
- You can select multiple packages with the checkboxes available at the left corner of each package.
- You can install multiple packages at once by selecting them and clicking
Install selected packageson the toolbar. Installations will be queued and executed by order - By selecting packages, you can export them in a file that can then be imported to bulk install custom package lists on other computers. This will make your life easier if you regularly install software on computers.
By exporting all your packages, you can easily backup your software list, so Windows reinstalls become way faster and easier.

This is the end of this article. Return to the UniGetUI Help and Documentation page?
⨉

⨉

© 2025, Martí Climent