Importing and exporting packages
Sometimes, if willing to share a list of packages with someone, or to backup your installed software, or to set up a new computer or VM with specific programs, you may want to create package bundles that can be easily installable on another machine. UniGetUI allows the creation of such bundles, as well as the installation of them. This article will explain how to create custom package lists and how to import them to another machine.Table of contents
Exporting packages
The idea behind exporting packages is simple. UniGetUI will generate a dictionary file containing the information
required to install a selection of packages to another machine.
Once the package list has been exported, it can
be easily imported on another machine running UniGetUI, and the packages on that list will be installed in the same
way as they are in the source machine without further complication.
Exporting packages does not export any kind of program data or executable content. Only useful information about them is stored.
Exporting installed packages
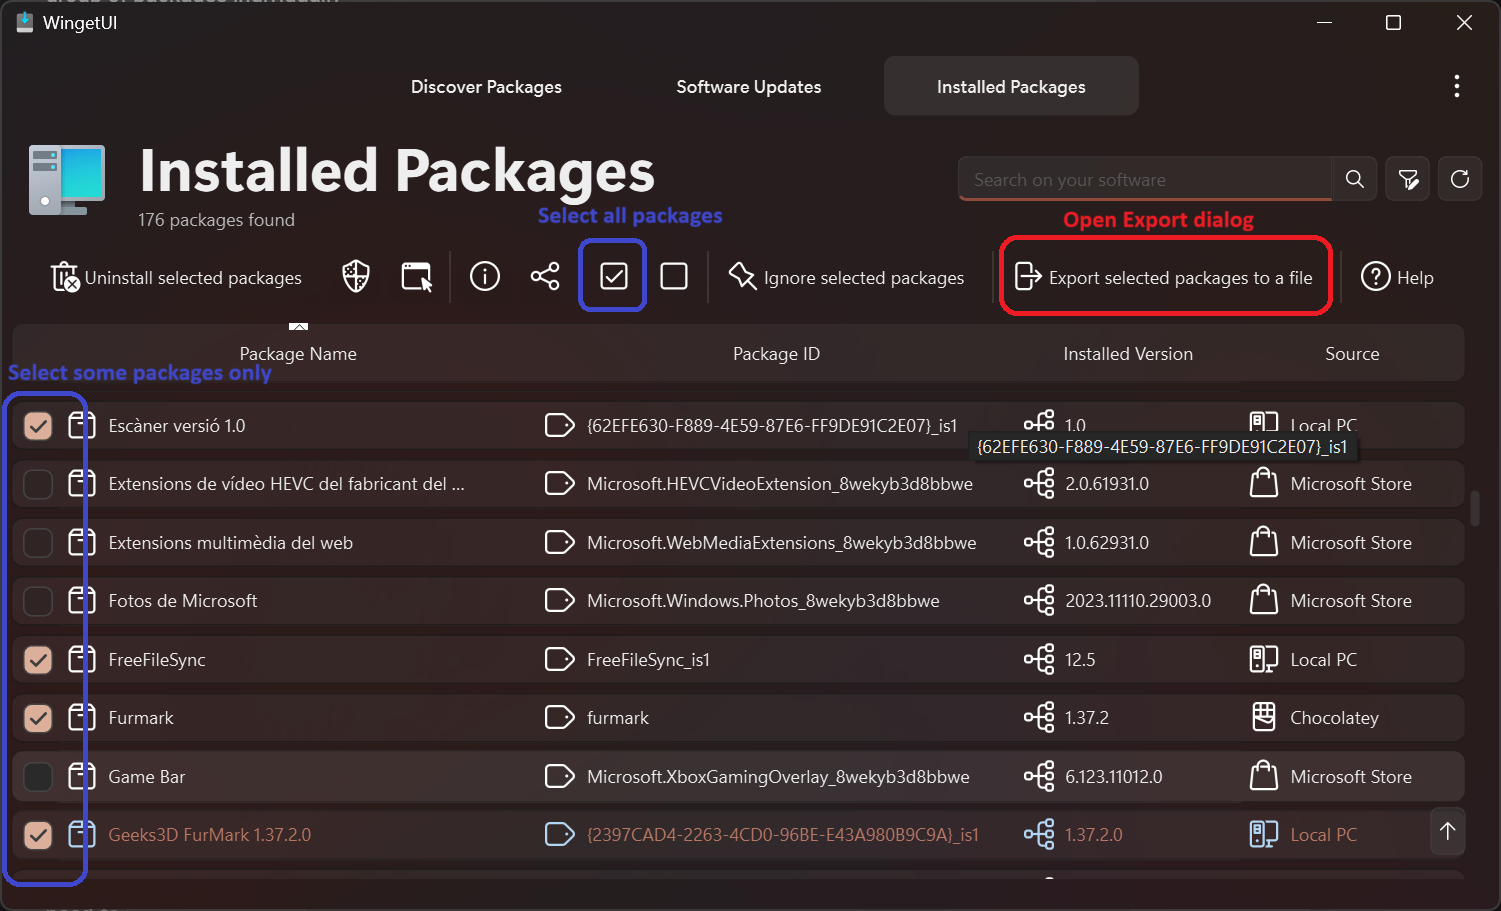
In order to export a list of the installed packages on your machine, you will need to first navigate to the Installed Software tab.
- To start, you will need to select the packages you want to export. You may want to select all your packages by
clicking
Select Allon the toolbar or by pressingCtrl+A, but you can also select a group of packages individually -
When the selection has been done, you will need to click on the
Export selected packages to a filebutton on the toolbar.
-
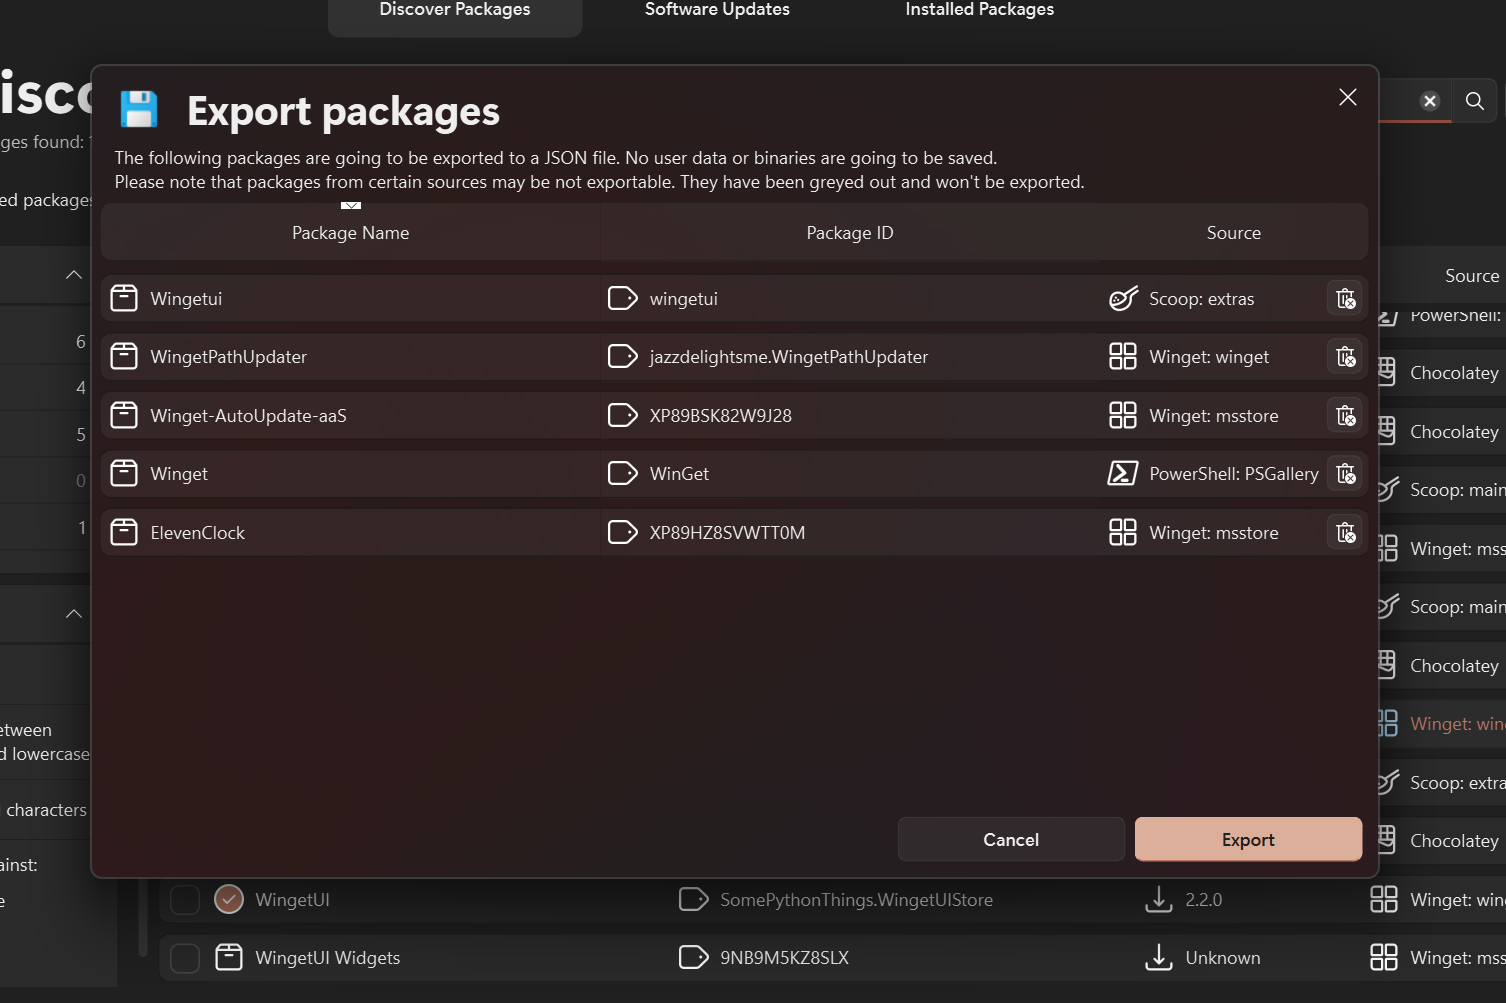
A dialog will pop up showing the list of packages that are going to be exported
You may remove packages from the list by using the rightmost button shown on each package.
Some packages may show greyed out. This happens when the packages are not installable from any package manager. Those packages won't be exported.
-
When you are ready, click on the
Exportbutton. This will open a file explorer window where you will need to select the location where you want to save the package list. Furthermore, you can change the output format for the file.JSONis the default one, but it can be changed toYAMLChanging the output format does not affect to the functionality of the file.
-
Finally, click on
Save. The file will be saved in the selected location, and an exporer window will pop showing the exported file.

Creating custom bundles from packages that are not installed
The procedure used when creating custom bundles is the same as the one used when exporting installed packages. However,
you will need to search and select each package manually on the Discover Packages tab.
Please note that selected packages will disappear when changing the query. Don't worry, they will still be added to the
list when clicking Export Packages
Then, as usual, review the list, click Save and choose the output file name and format.
Importing packages
The process of importing packages is very similar to the process of exporting them.
- To start, navigate to the Discover Packages tab and click the
Import packages from a file -
A dialog will pop up asking you to select the file you want to import. Select the file and click
Open.
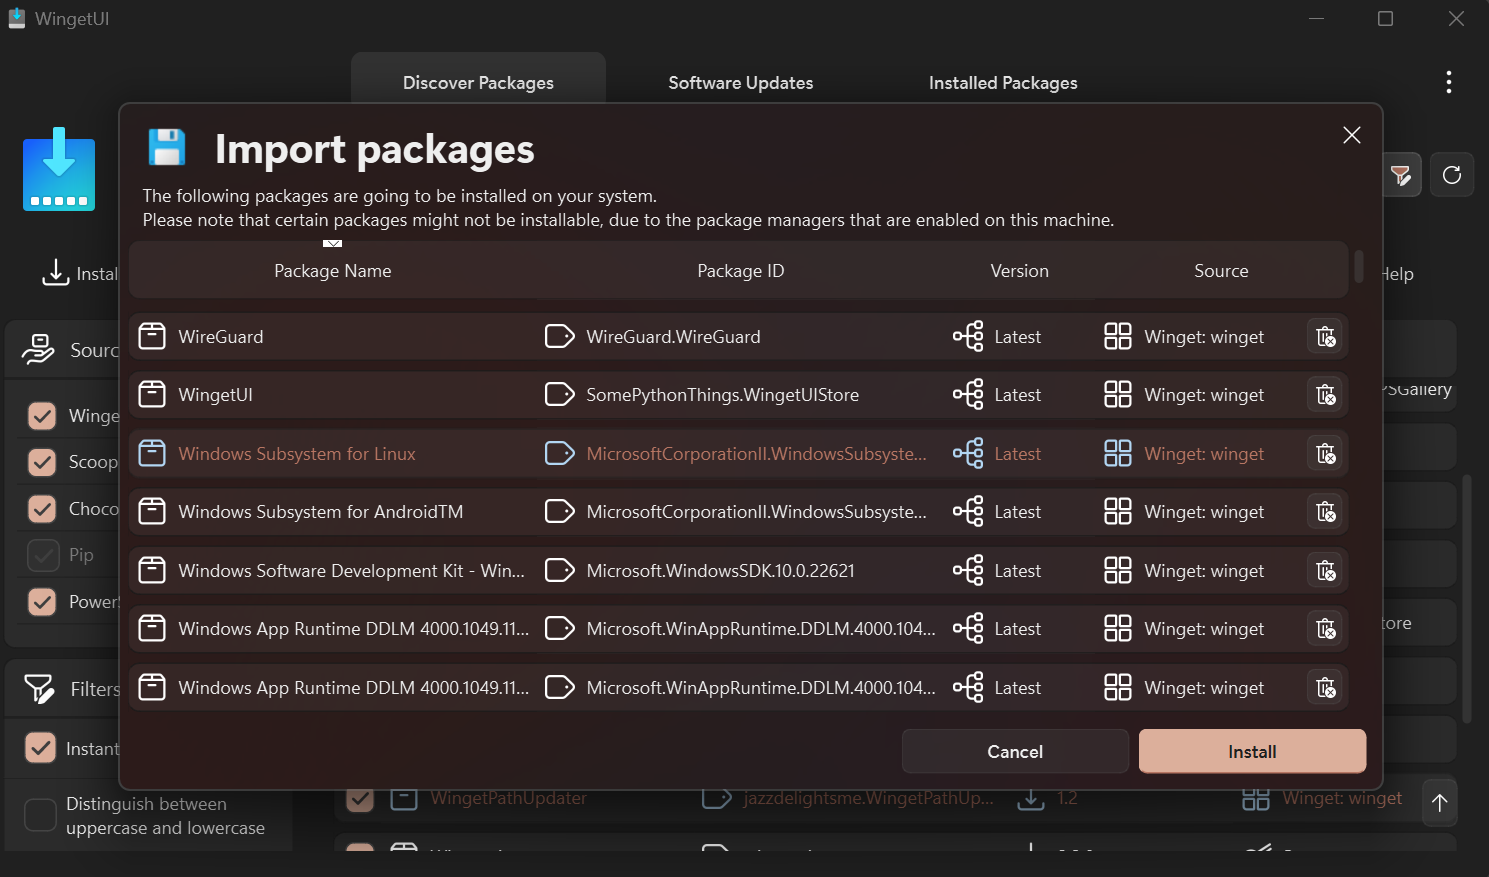
Both JSON and YAML files are acceptedThen, the list of package to be imported will be shown. If a package can't be installed*, it will be shown greyed.
-
Remove any unwanted packages from the list by clicking the rightmost button on each package.
When ready, click the
Installbutton. The packages will be installed automatically.

* A package could not be installable because it was installed from a Package Manager or from a source that you don't have installed.
This is the end of this article. Return to the UniGetUI Help and Documentation page?


© 2025, Martí Climent